
I hate spiders.
Like, turn into an angry rage monster on a murder spree when I see them in my apartment.

If I’m outside and I see one, fine. Your house, your rules. But I do not recall ever inviting one of you into my home.
So when I see you, you are fair game. And I may use every tool at my disposal including, but not limited to, shampoo bottles, soap dispensers, flip flops, Arabic text books, vacuum cleaners, chemically based pesticides, water, or newspapers, to discourage you, and your creepy relatives, from ever entering my home again.
Unless you are a chocolate spider.
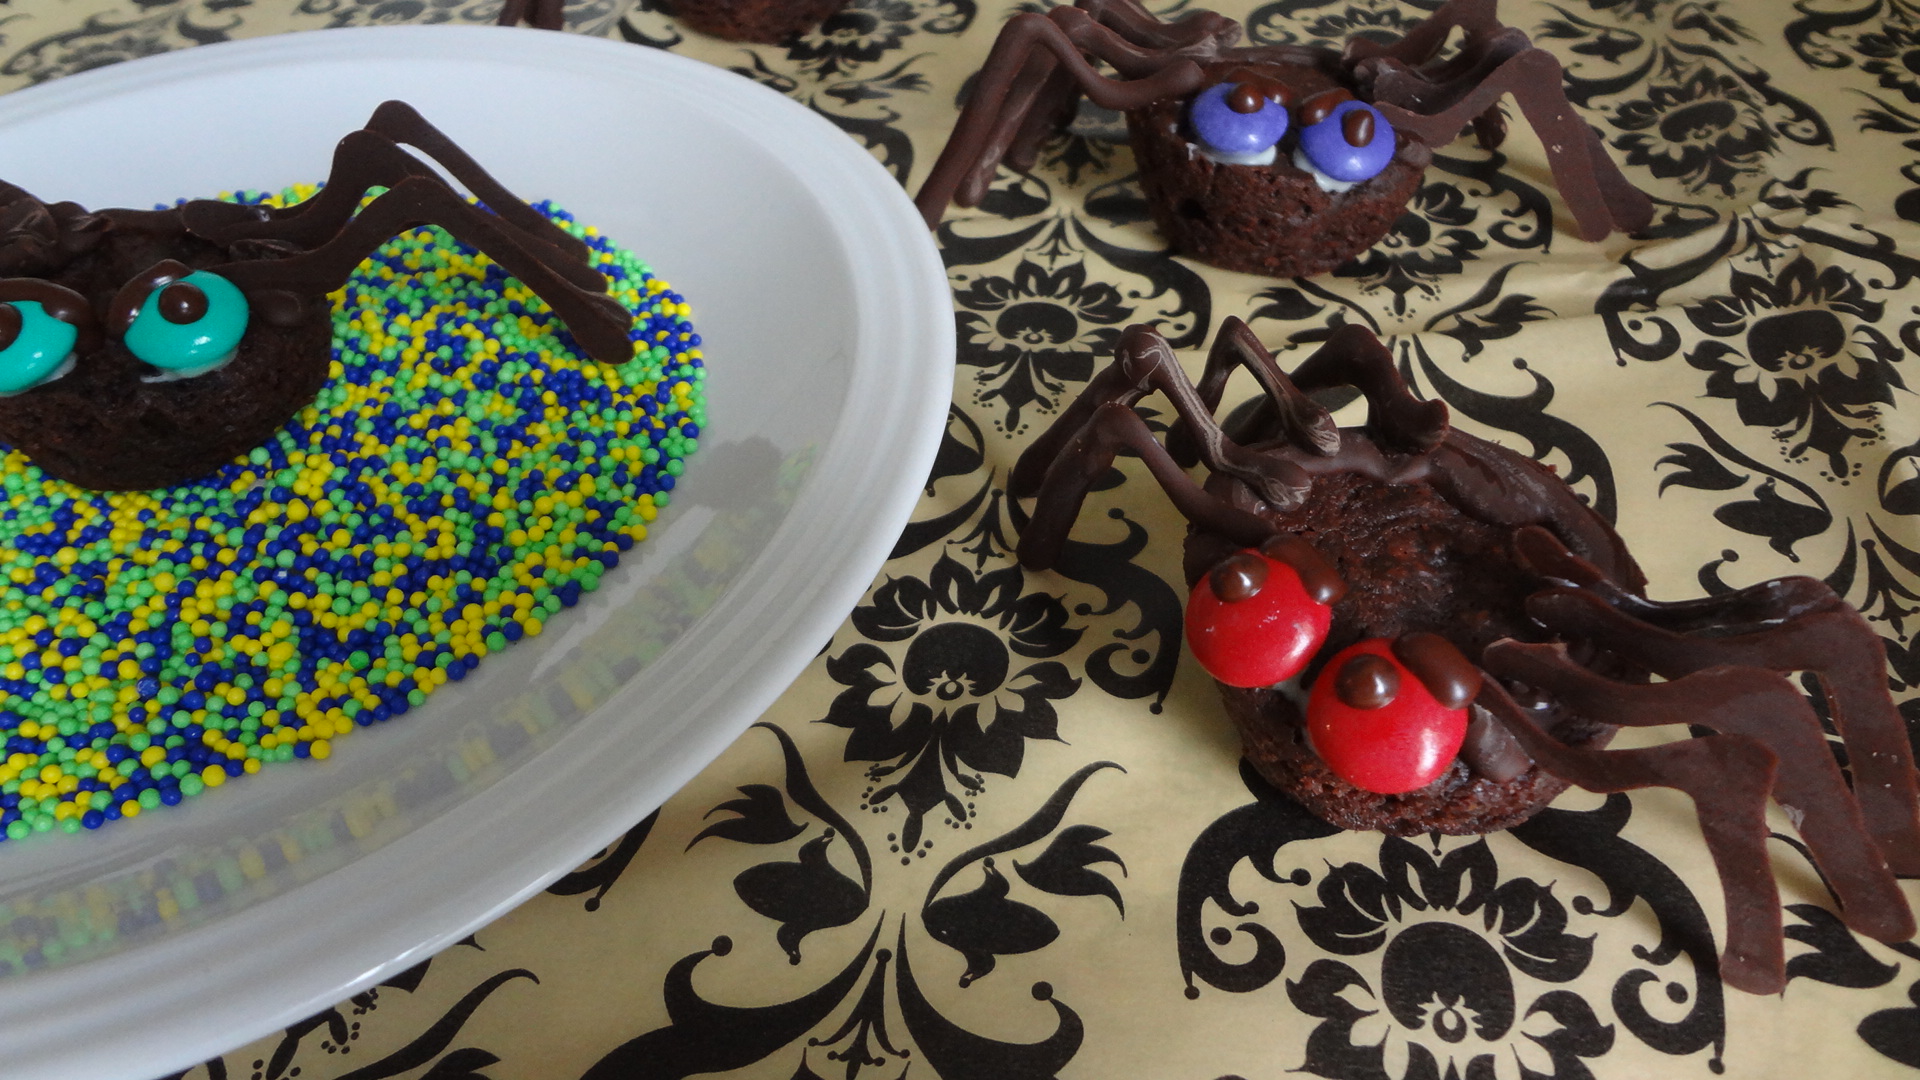
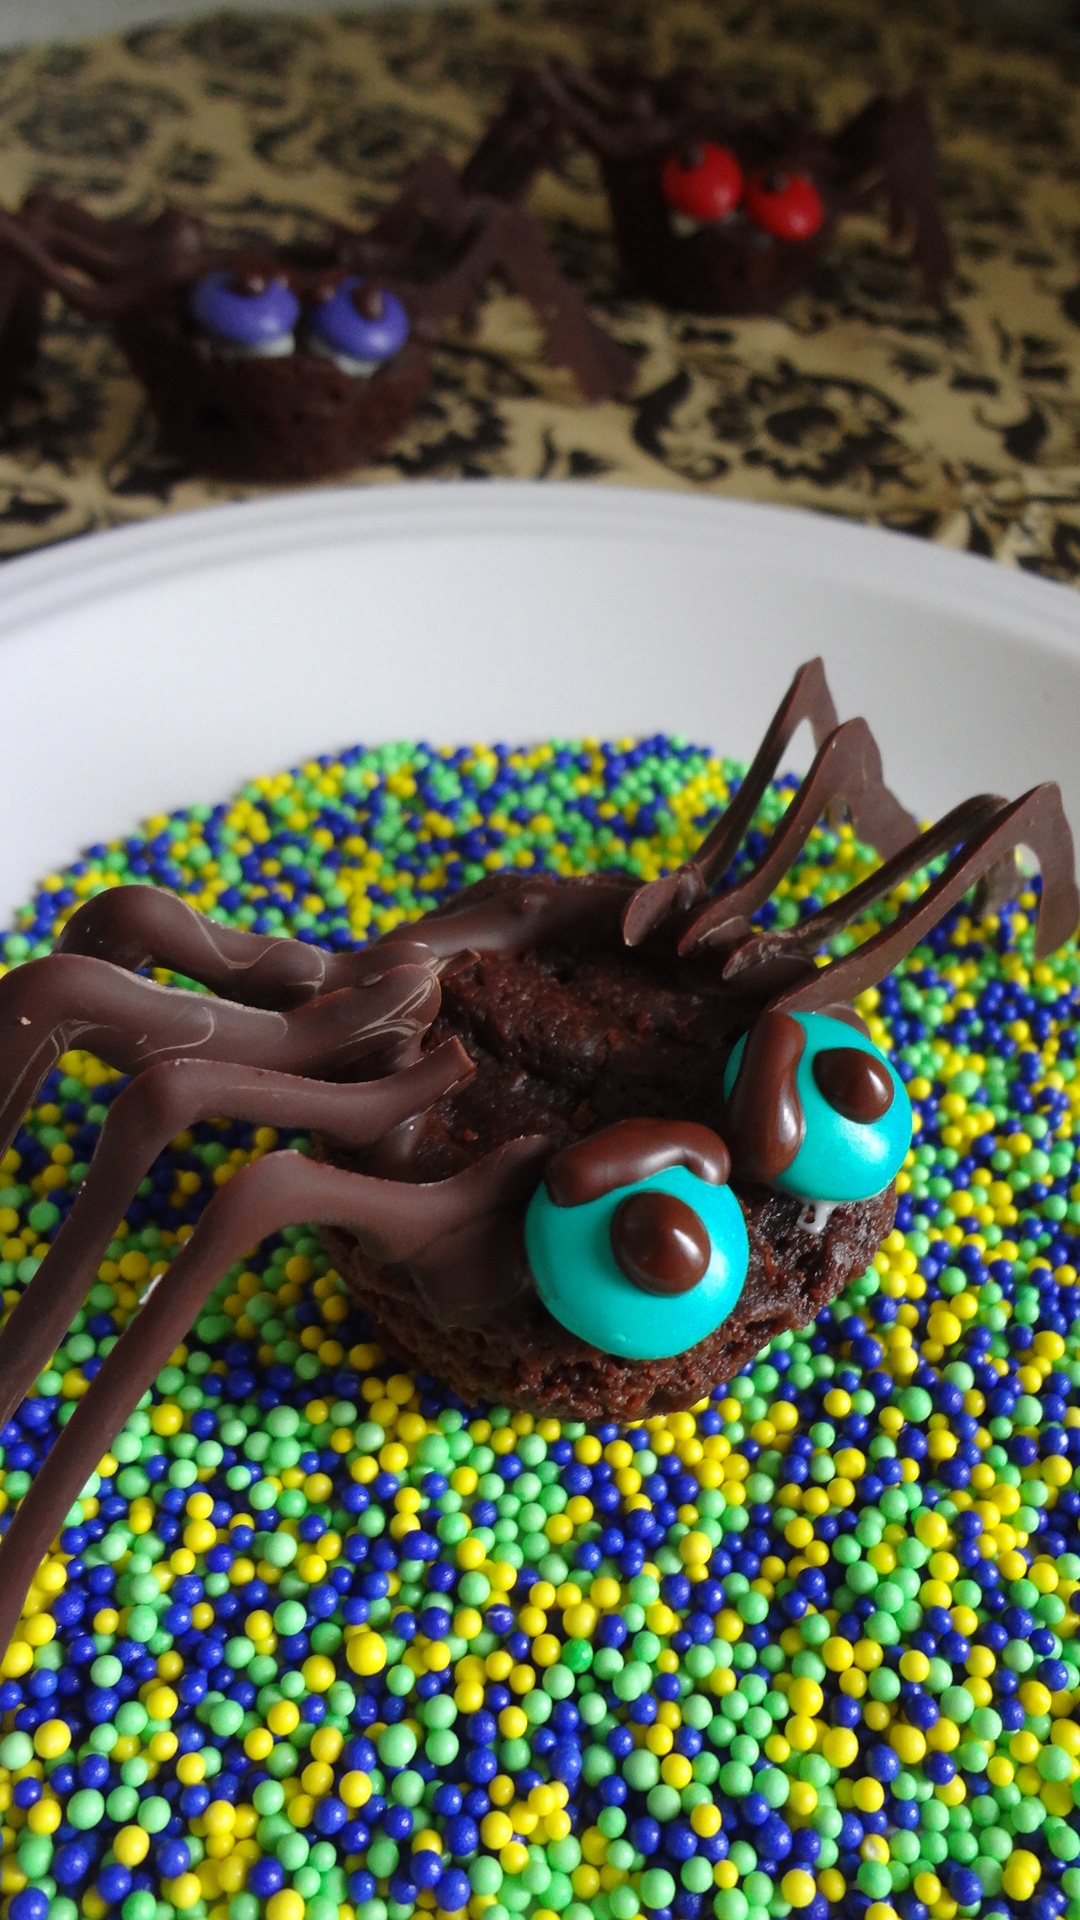
These adorable little chocolate spiders are welcome in my kitchen any time.
They’re fairly straight-forward to make, and pack a big cute factor when your guests arrive and see the little creepy crawlers ready and waiting.
But be warned before you take on this project, it does take a while to complete, so set aside an entire afternoon if you’re planning to make more than two dozen or so of these little guys.
Ingredients:
- 2 dozen brownie bites – I used store bought, but feel free to make your own if you’re an eager beaver
- 1 cup chocolate chips
- 24 M&Ms (plus more for snacking!)
Directions:
1. If you’re making your own brownie bites, bake and cool them completely before you start decorating. If you’re using store bought, you’re good to go!
2. Draw your spider legs on a sheet of wax paper. You need 8 legs per spider, so draw on as many as you can, this will save you time later. Here’s a template of the leg design I used, but if creativity calls you elsewhere, go for it! 
3. Put the chocolate chips in a small ziplock bag, and microwave for 30 second intervals, until the chips are melted.
4. Flip the was paper with the leg designs over (graphite spiders are not as tasty as chocolate spiders) and snip just the very tip off one corner of the ziplock bag. Use the ziplock bag as your piping bag, and pipe over your spider legs. Then set them aside, and let them cool completely. Once they’re cooled, they should be very easy to remove by peeling the wax paper away from the chocolate leg, but be careful, they can be delicate depending on how thickly you piped them.
5. While your legs are drying, you can be adding faces to your little arachnids. Set the brownie bites out, with the widest end facing the ceiling, the more narrow end on the table. Using your trust bag of melted chocolate, pipe two chocolate dots where ever you’d like your eyes to go, and press an M&M on to each one. Once the M&M is secure, you can use the melted chocolate to add eyes, facial expressions, unibrows, whatever you like.
6. Once your legs are completely dry, pipe a circle of melted chocolate around the top, outside edge of each brownie bite. *TIP!* This step is a lot easier when you give the chocolate a moment to cool before trying to attach the legs. It helps them stand up better so you don’t have to sit there and hold them until they dry.
7. After piping your chocolate ring a top each spider, and letting it cool slightly to make your life easier, add 4 legs on each side. This is probably the most delicate part of the process, as those of you with naturally warmer hands, or firmer grips, may find yourself snapping a leg or two. I usually eat these in the name of quality control. 🙂
8. Once you’ve added all your legs, let them cool completely, for about 30 minutes, before you try to move them. The legs can be very breakable, so take that into account if you’re thinking about transportation. A large flat tray covered lightly with plastic wrap would be the best way to get these to a party. Or just host a party yourself and save yourself the trouble!
